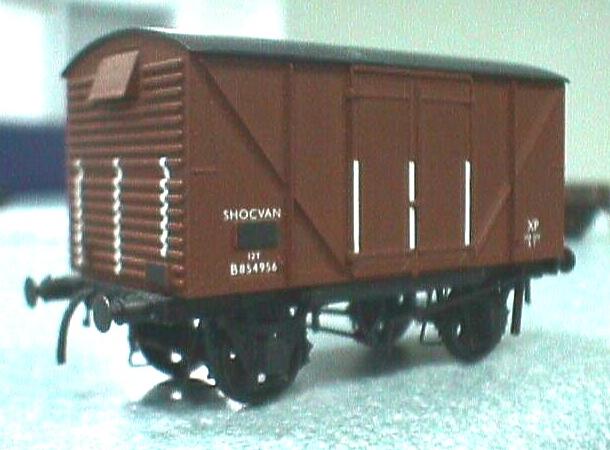
Simon Dunstall's March 1999 pic of his yet-to-be weathered Shocvan has MJT duplex buffers, Red Panda BR clasp brakes, and will be fitted with instanter couplings. The transfers are HMRS pressfix, including the 'shock stripes'.
|
BR diagram 1/218 and 1/220 Shocvans
by Russ Elliott, Tony McSean and Simon Dunstall
Building the Red Panda Kit, by Russ Elliott, December 1998
As is normal with Red Panda kits, conversion for P4 use is relatively simple, and involves the usual chore of chopping off the moulded W-irons, but saving the axleboxes, which are fixed later to the replacement metal W-irons. Being a box van, there are no floor height problems, and any form of suitable W-iron can be used – I used the BR type supplied by the Scalefour Society, but have added my own bridle plates (at the foot of each W-iron) from scrap bits of brass fret.
Horizontal triangular fillets of 10 thou black plasticard were fitted between the headstocks and the solebars, plus the usual addition of hanging vacuum pipes (modified ABS F324) to the headstocks. From photographic evidence of other Shocvans, I realise that I should not have put the triangular fillet between the top of the solebar and the headstock, only the bottom one. I also discovered (after construction of course!) that the body should be spaced slightly off the chassis (I reckon about 10 thou, or something a little less) in order for the body to be able to slide on the chassis, as it is intended to on these Shocvans.
I found that I had to lengthen the chassis by 1.25mm in order that it could be kept at 4mm longer than the body dimension (as stated in Don Rowland's BR wagon book), and thus preserving the correct 'overhang' appearance at the ends of the vehicles: this did mean that my wheelbase increased by the amount of the chassis lengthening, but you wouldn't have noticed if I hadn't told you. The chassis cut and lengthen was made at a position behind the shock assemblies, so it doesn't show. Don't regard the 1.25mm extension as sacrosanct – it will depend how you file up and fit the mitres of the body sides, and everyone does this a little differently.
I made a new roof out of moulded 30 thou, since I found the one supplied in the kit just a tad short, but again, this might just have been a reflection on the dimensions I arrived at when putting the body sides together.
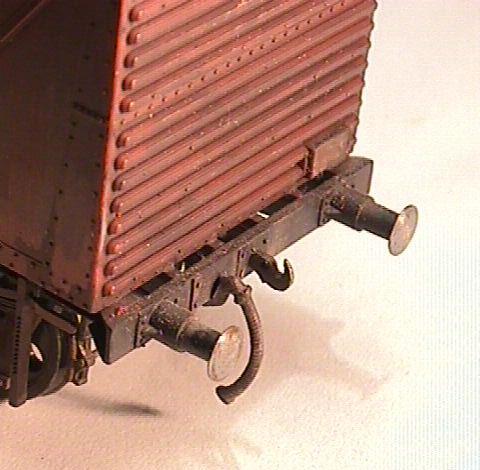
The only really disappointing moulding in the kit is that for the shock absorbers, and I went completely over the top in providing some replacements out of turning plastic rod into screw threads (to simulate the springs) and hiding these behind new front covers made from 15 thou plastic – one can just see the springs peeping out from under the cover, but it was a lot of work for what many people will regard as little reward. The main benefit of the new assembly was to allow a little daylight between the top of the shocs and the bottom of the vehicle side, as per prototype photos.
I decided to model the wagon in a very worn down condition, so the body, which is moulded in a light bauxite colour, was first given a thin wash of dark brown. Then bright salmon-pink patches were brush-painted on, following the details in a particular colour picture. Quite what very light rust is doing on plywood sides I'm not quite sure, but maybe they are repainted patches of bauxite which had subsequently faded to the characteristic shade. There then followed a brushed coat of thin dust, to meld in the shades.
My wagon is awaiting lettering, final weathering and varnishing.
Prototype information, by Simon Dunstall, March 1999
Diagram 1/218 and 1/220 shock absorbing vans (shocvans) were the last in a line of such vans developed by BR. Red Panda's instructions give some very handy details about the prototype. The kit is for a diagram 1/220 vehicle (B855001-855100) with plywood sides, two-part corrugated ends, oleo buffers, BR-pattern brake gear and BR plate-front axleboxes.
There seems to be (at least) two general types of ply door put into use by BR, and used on both shock absorbing and ordinary standard vans. Later vans, including those from Diagrams 1/218 and 1/220, have triangular pieces of sheet metal (presumably) in the corners, while the doors on earlier vans don't. Keep this in mind if you want to use the Red Panda kit to build an earlier shocvan. Some older vans might have received either newer doors or triangular corner reinforcement over the course of time, though I can't point to a particular example.
The kit's roof comes without rainstrips, and this is fortunate because the rainstrip patterns changed from vehicle to vehicle. Shocvans seem to often have had lamp irons on the left-hand sides of the ends, about 3 ribs up and spanning a pair of ribs.
Photos of diagrams 1/208 and 1/220 can be found at Paul Bartlett's BR wagons site.
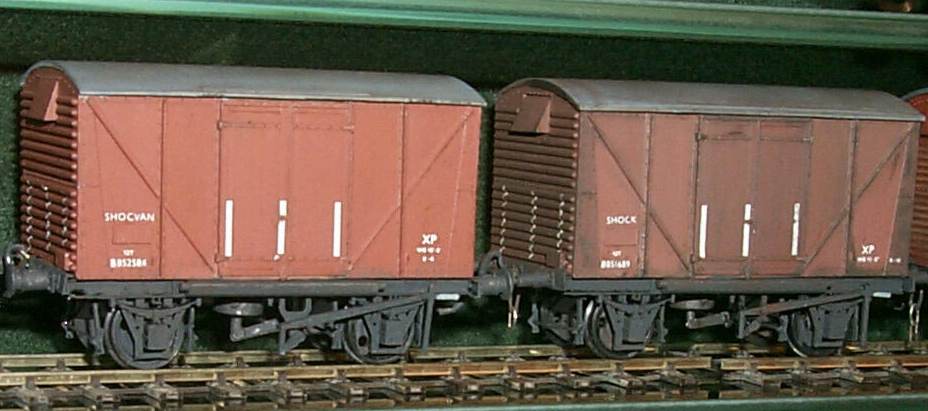
Tony McSean's pic of his two ply-sided BR shocvans, in October 1999. They are built more or less as the kit intended apart from compensation and variant MJT cast buffers. Tony writes: "As you can see from the slightly saggy buffer beams, I forgot how much heavier white metal is than plastic and didn't take enough care when building them! Still, I'm pleased with the weathering and they really are excellent kits."
|
© Russ Elliott, Simon Dunstall and Tony McSean
First issued December 1998
Addition made in October 1999
| Return to top of page | Safety, privacy and cookies |