BR Class 07 0-6-0 diesel-electric shunter
building the Craftsman 07 kit
by Simon Dunstall
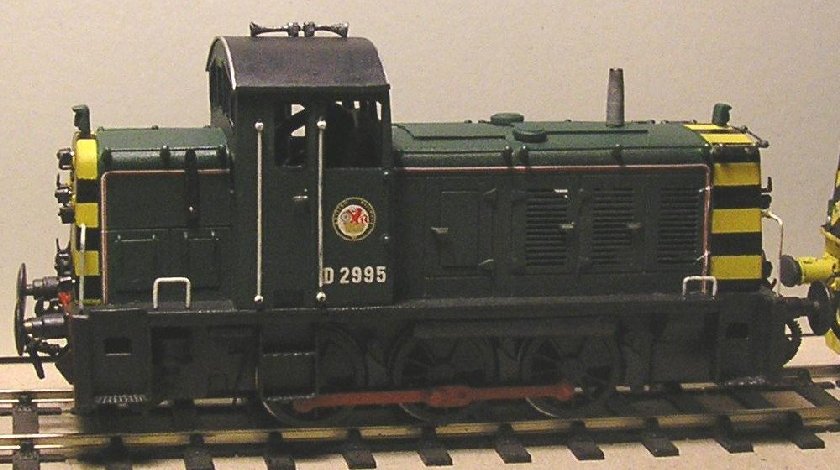
Paint is Railmatch SR Green, Bufferbeam Red and Warning Yellow, with Humbrol 'Coal Black' for most of the black. The red-white lining was custom printed for me by Brunel Models here in Melbourne, the roundel is Fox, and the numbers are from a Kemco sheet. The wasp stripes are sliced from a sheet of plain black decal, assembled in several pieces each, fixed over a period of a couple of nights, touched up with black paint and secured with a coat of Micro-Satin acrylic. The loco is now awaiting weathering.
|
The Craftsman kit came with everything except wheels, motor and gears. A DS11 motor mount was provided by Craftsman, but I passed on that. The loco is almost entirely brass except for some whitemetal fittings such as lamps, buffers and vacuum cylinders. Happily, the bonnets were pre-formed (no bending-up needed!) although some tweaking was necessary.
Additional items I've used in building the 07 include a Mashima 1224 motor, a Branchlines 38:1 SL gearbox, a NorthWest Shortline Models flywheel (12mm OD, 7mm long, 1.5mm bore), Alan Gibson drivers and crankpins, MJT basic hornblocks, fine brass mesh for the front grille (obtained from a carburettor shop), Scalelink etched-brass chequerplate and Alan Gibson medium handrail knobs. It appears that, when in green, the 07s had white/red (or possibly dove grey/red) lining around the bonnets.
The kit was extremely cheap when I bought it, and so represents excellent value for money. The chassis is designed for a rigid wheelbase, but suspension can be incorporated easily. Overall, it is a lovely kit for the price, though not without some little errors and inconveniences. Some over-etching made aspects of the kit much more involved to build than was intended (mostly in the cab area). However, there's no real pitfalls in this vehicle, just a need for a few homemade replacements for certain parts.
I found it best to bend up the lamp irons from brass strip and to grind them to shape once fitted (cutoff disc in minidrill). I decided to leave marker lights off until after the wasp stripes were applied. I used the fine mesh (noted above) for the front grille, as it looks much better. Some tea strainers have a fine mesh that could be used instead. Also, I made new fuel tank gauges from plastic; these replacements have a groove in the front and are a more prototypical shape. A new exhaust was turned on a mini-drill from 1/32" i.d. brass rod. I replaced the mountings for the horns (cab roof) with brass strip, and soldered these strips through the holes in the cab roof – this way they look a little better and should be more durable.
The supplied Oleo buffers can be converted to sprung quite easily. I'd recommend strengthening the buffer beams with brass strip 'buttresses' behind the bend, to guard against the sort of incidents (e.g. dropping) that can occur. It is also easier to build replacements for the steps/bolsters/whatever that are attached to in the front of the buffer beams, and it similarly is better to make use of homemade fuse wire-wound vac pipes.
The Craftsman chassis is designed for rigid assembly, but can be given compensation or suspension modified without much hassle. My loco has sprung suspension, using quadruple springy equalising beams of a somewhat crazy design that works fine but won't be repeated (there are several suitable commercial offerings now on the market now). My loco drives on the centre axle – the gearbox hangs off the axle and the motor points forwards into the long bonnet. Sideplay on the centre axle is set at a comparatively generous 0.5 mm and a small amount (0.25mm) of sideplay is allowed on the front drivers.
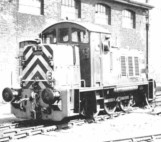
Some good photographs of 07 shunters: Railway World, August 1994, Page 42 (07011 in ICI livery in 1994) and Robert Stephens (The Colour of British Rail Vol. 1) Diesel Pioneers, Atlantic (D2996, BR Green in 1965).
© Simon Dunstall
December 1998
updated January 2002 and January 2006
| Return to top of page | Safety, privacy and cookies |