A simple lighting circuit
by Ted Scannell
|
The bidirectional circuit (move mouse over the picture to activate the light):
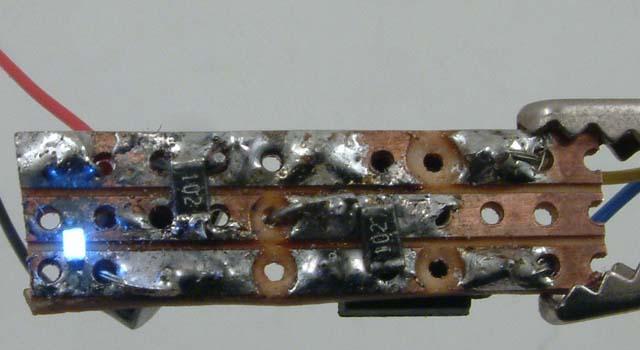
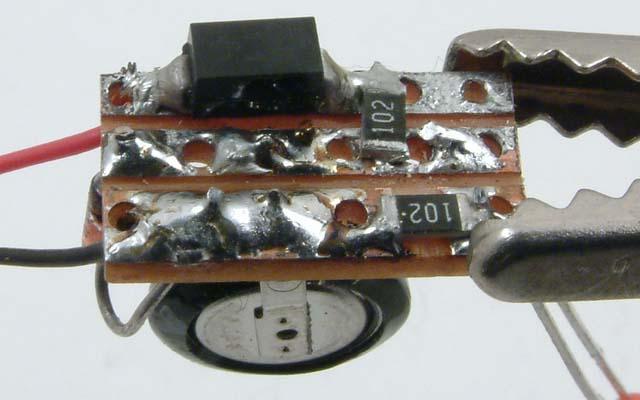
The bidirectional circuit component side
|
| |
|
The unidirectional circuit:
|
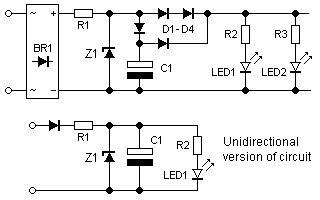
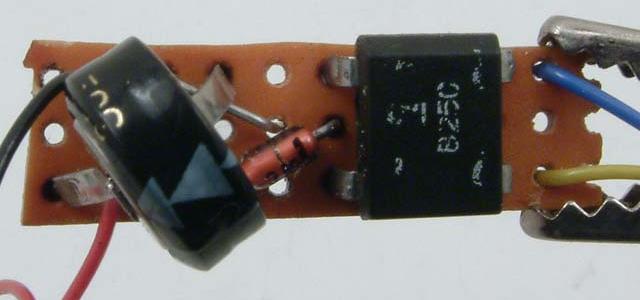
BR1 is a small dual-in-line bridge rectifier. This is for use with DCC, or if the lighting is required to be bi-directional, as in carriage lighting. For single direction in DC, such as in tail lamps, it should be replaced with a single 1N4002 diode, wired the appropriate way round.
In the case of a brake van, two of these circuits could be used in DC, or for DCC, an accessory decoder could switch the appropriate lamp.
R1 is a resistor, and controls the rate of flow of current into the circuit. The original used 470R, but I couldn't get small ones of those, so took 1KR instead, so the brightness comes up over a few seconds.
It could be replaced with a trimmer pot, making this feature adjustable, at the expense of larger size and a few more pence. A 100R resistor should be used in series with this, though, else there is a danger of overloading the Zener diode.
Z1 is a Zener diode, which clamps the circuit after R1 to a specified voltage. The one I used was from stock, 4V7, so as the cap charges, the final voltage tends towards 4.7 volts. One of 5V2 would be ok, or 5V6 even better, but that is the max for the capacitor specified.
D1 to D4 are there to minimise the output voltage difference between the charging voltage reaching the LEDs and the discharging voltage. Without these there is still a slight dimming and brightening according to the pickup, the difference between which reduces the longer the lights are on. It might be worth trying leaving these out to start with, especially if the supply is DCC.
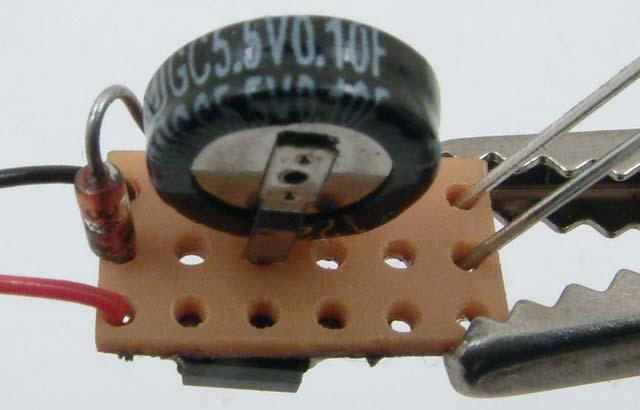
C1 The capacitor. The 0.22F supercaps are about the same size as the rectifier, and contain enough charge to keep a couple of LEDs on at reasonable brightness without power supply for 3 to 5 minutes. Enough for a station stop on DC. The more LEDs in circuit, the shorter the time.
LED1 and resistor – whatever you need. If you want bright white light, the resistors can be as low as 220R, but the time they remain on will be shortened. For dim brake van tail lamps, up to 1K5 will be fine, and one lamp will stay on for about twenty minutes after the power goes off.
As for size, the test vero I built is 8 x 12 x 27 mm, but this could be reduced greatly by using a diode instead of a bridge, and fitting the cap remotely, in the trussing for instance.
If you can fit a DCC chip, you can build a few of these...
© Ted Scannell
updated 27 March 2007
| Return to top of page | Safety, privacy and cookies |